What is an Overlocker? – Overlocker Machines Explained

What does an overlocker do?

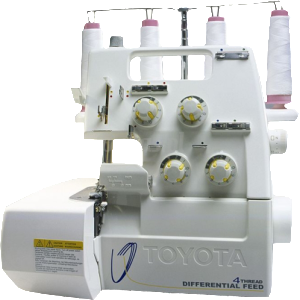
Toyota-SL3335-Overlocker

In a nutshell, an overlocker is a sewing machine that stitches with either 3, 4 or 5 threads at the same time. They are mainly used to join seams, trim off the excess fabric and stop the cut edges from fraying all in one simple operation.

Pictured to the right is a Toyota SL3335 Overlocker
. read more

How to Make an Envelope Cushion Cover

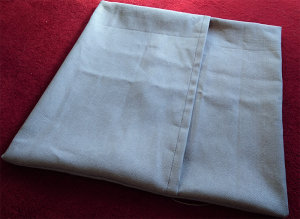
Envelope Cushion CoverThere are several ways to make a cushion cover. Today we will take a look at how to make a cushion cover that I consider to be by far the easiest. This type of cushion cover is very similar in style to the traditional pillow case and is often called an Envelope cushion cover.

The fantastic thing about making an envelope cushion cover is that it is so simple. In fact it only takes two hems, two folds and two sewn edges to complete the finished item.

Note:
One tool frequently used in sewing is an Overlocker – In this tutorial, for the benefit of those who don’t have an Overlocker, I will show you how to make an envelope cushion cover without using one.

Things You’ll Need:

  • Fabric
  • Thread
  • Tape Measure
  • Scissors
  • Pins
  • Sewing Machine
  • Cushion Pads / Inner

How to make an Envelope Cushion Cover without an Overlocker.

Looking at the list above, although you will need them all, the first thing we want is our cushion pads. You could manage without having it to hand, but at the very least we need to know the size. For the purpose of this tutorial, I will use the very common 17″ x 17″ (45 x 45 cm).

Once we have the size of our cushion pad, the next question to answer is – How many cushion covers will I be making? – We need to know this in order to calculate the amount of fabric we will require. For this example, lets say I’m making four.

Calculating cushion cover fabric

So we know the size of our cushion pads, and we also know how many we would like to make. Now, before we can calculate the amount of fabric we need, there is one final question – How wide is the fabric we are thinking of using.

You may already have your fabric and need to calculate how many cushion covers you can make from it. Or, maybe you are calculating how much you will need before you purchase it. If your case is the later, I highly recommend taking a look at Terry’s Fabrics, they have an excellent range at very competitive prices.

Anyway, back to the task at hand. The fabric I have chosen for my cushion covers has a width of 60″ (150 cm).

Now for the Maths… Obviously, we want to cover both sides of the cushion pad. Also, because we are making a envelope cushion cover, we need to create an overlap. I recommend at least a 6″ (15 cm) overlap. Then we need to allow for seams and a couple of hems.

To calculate for the length of fabric for one cover:

  • First we need to double the width of our cushion pads.
  • Next we add sufficient fabric for our overlap.
  • Then we allow for two hems.

Putting that in to figures: 17 + 17 + 6 + 2 = 42″ (45 + 45 +15 + 5 = 110 cm).

So for each envelope cushion cover, we need a piece of fabric that is 42″ (110 cm) long.

To calculate for the width of fabric for one cover: read more

How to Shorten Eyelet Curtains – Ring tops Step by Step

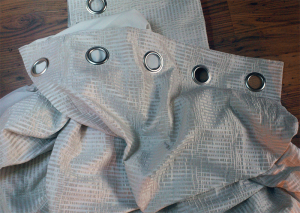
How to Shorten Eyelet Curtains - Ring TopsSo you need to shorten some eyelet curtains, or ring tops as they are also known … No problem. Simply follow this step by step guide and you’ll have them done in no time.

When you shorten eyelet curtains (Ring top curtains), they need to be shortened from the bottom.

This may seem an obvious statement but some other types of curtains can, and should be, shortened from the top. When you shorten Net Curtains, it is almost always done from the top. Or, Pencil pleat Curtains – they can also be shortened from the top. Which can make the job a lot easier especially if they are lined – See our guide on How to Shorten Curtains the Easy Way for more info.

Anyway… back to this guide.

How To Shorten Eyelet Curtains:

//
//
Things you will need:

  • Tape measure.
  • Pins.
  • Seam ripper.
  • Scissors.
  • Thread the colour of your Eyelet curtains.
  • Thread for sewing hems on the lining fabric (usually white or cream).
  • Sewing machine or Needle (if sewing by hand).
  • And of course some eyelet curtains – (Ring top curtains).
  • read more

    How to make a pillowcase – Easy sewing project – step by step

    Jumping straight in then, in this tutorial we will be showing you how to make a pillowcase in its most basic form. We will start simple, then once you know the basics, we’ll add a few ‘make a pillowcase’ tutorials with slightly more complicated designs.

    Things you will need to make a pillowcase:

    • Fabric
    • Measuring tape
    • Scissors
    • Pins
    • Sewing Machine
    • Thread

    Making a pillowcase in its basic form involves only two hems and two seams. You can’t get much more simple than that.

    Step 1: Cutting your fabric to size.

    To make a pillowcase we first need to measure and cut our fabric to size. In the UK, the standard pillowcase size is 29.5 inches x 19.5 inches (75cm x 50cm). This would be the finished size we are aiming for. When cutting our fabric we need to allow for hems and seams.

    So, with our fabric on a flat surface, we cut a rectangular panel that measures 68 inches x 21 inches (173cm x 54cm). Now I do realize that the length does seem rather long but all will make sense as we progress to make a pillowcase.

    Step 2: Sewing the hems.

    Now that we have our fabric cut to the correct size, we need to sew the hems at each end. In this ‘make a pillowcase’ tutorial, I have given a hem allowance of 4 inches (10cm).

    So now, with our fabric folded in half length ways, measure in 2 inches (5cm) form each end, and put in your marker pins.

    Open out your fabric so it’s face down and at one end, fold your fabric back to form a crease level with the two marker pins.
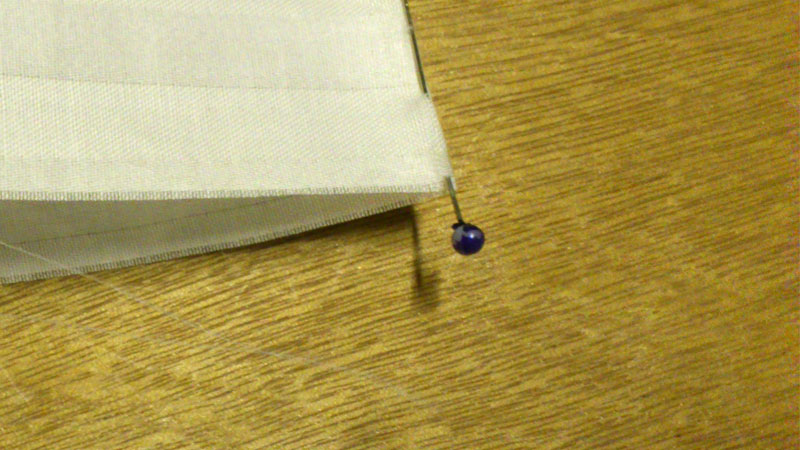
    How-to-make-a-pillowcase-hem-fold

    Place a few pins along the crease to hold it (or iron it if you prefer). Now fold the cut edge down into the crease to form another crease and complete the hem. Pin (or iron) along the second crease and remove the pins (if used) from crease 1. Next, do the same again the other end.

    Once both ends have been folded and pinned, we can stitch them in place removing any pins as we go.
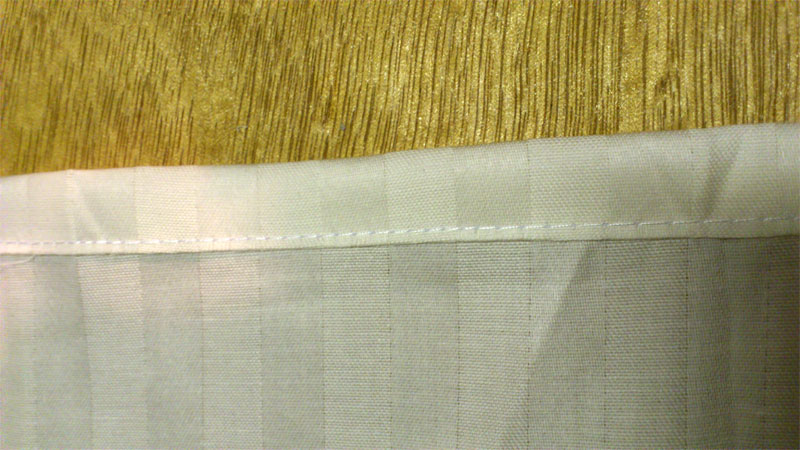
    How-to-make-a-pillowcase-hems

    Step 3: Sewing french seams.

    While writing this guide on how to make a pillowcase, it dawned on me that very few, if any, of my readers would be likely to have an Overlocker (what’s that?). So I have decided to show you how to use french seams to make a pillowcase. Don’t panic if you don’t know what french seams are, just read on.

    Now, although the way you make a pillowcase with french seams is different, it does eliminate the need for an overlocker. Anyway… enough waffle, let’s get on with the task at hand.

    So, fabric folded length ways then, measure in 5 inches (13cm) from one end and put some marker pins in both layers. Your getting good at that now aren’t you! 🙂

    Open your fabric out with the face down. Then, as we did with the hems, fold the end back to form a crease level with your marker pins. Pin or iron in to place.
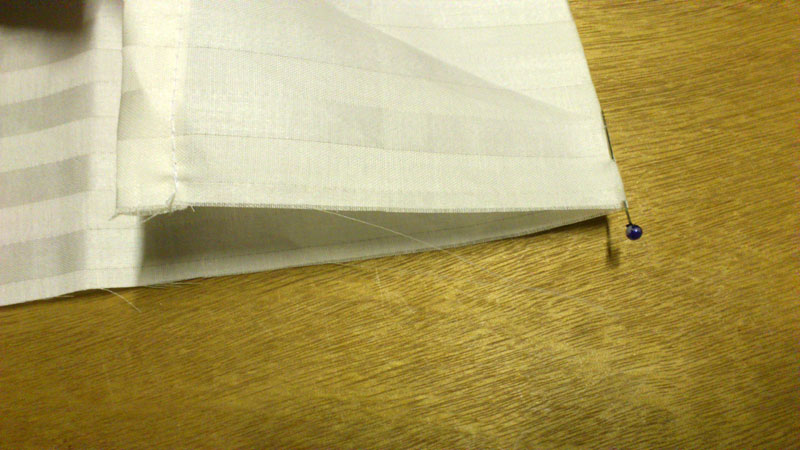
    How-to-make-a-pillowcase

    Now, taking the hem at the other end, fold your fabric in half so that the edge of your hem is also level with your marker pins. Smooth out any wrinkles, pin along the cut edges and remove the marker pins.

    Sewing Project Books

    Also Available for Kindle!
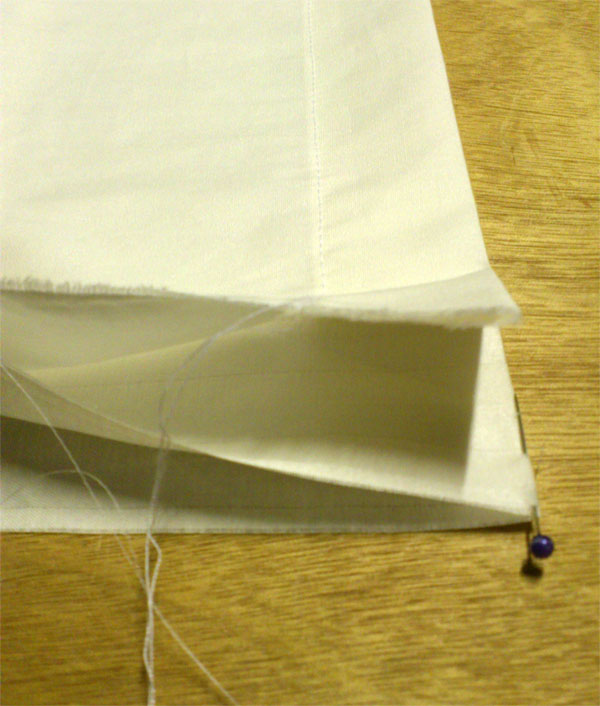
    How-to-make-a-pillowcase-with-French-seams-fold2

    Next, sew along the cut edges you just pinned, sewing about half an inch in from the edge and removing the pins as you go. (If you’ve never made anything using french seams before, you may be thinking – “Hang on a minute… if I sew it like that, the cut edge will be on the out side.” – Well, Don’t worry… things will become clear in just a moment.)

    After sewing along both edges, just have a quick double check that all pins have been removed. Then, with our ‘almost pillowcase’ laid out flat, trim off the cut edges on both sides, about a 1/8 of an inch (3mm) way from your stitches.
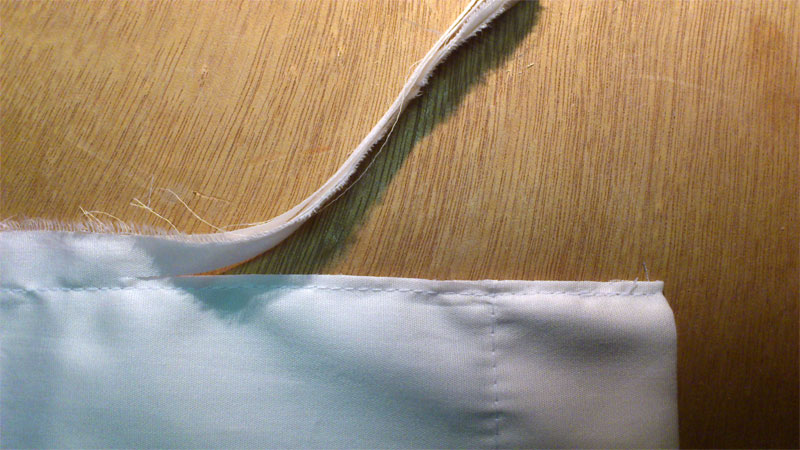
    How-to-make-a-pillowcase-trimming-edge

    Taddaaa!!… (Oop’s sorry, we’re not ready for that yet.)

    Now turn your ‘almost pillowcase’ completely inside out. Next we need to iron the seams on either side. Getting the seams pushed out nice and straight while ironing, can prove to be a bit tricky. Luckily though, I know a little tip that can help.

    Tip: read more
    How To Sew

    How to sew?… That is a good question! However, I’m afraid I need a little more information like – How to sew what? – I mean, lets face it, there are a lot of things to choose from and i’m hoping you don’t mean seeds. Also, do you want to learn to sew by hand, or using a sewing machine?

    To be honest, personally, I love my sewing machine. I don’t mind the odd bit of sewing by hand, but it’s definitely a case of the less the better. Maybe it’s because I’m not very quick at hand sewing, or because I have an awful habit of jabbing myself with the needle.

    How to Sew – Learn to Sew with a Sewing Machine

    Obviously there are some things that need sewing by hand like hemming trousers and skirts. Unless that is, you happen to have a Blind Hemming Machine. That would be a subject for another time though.

    Learning how to sew with a sewing machine (a standard one), is relatively easy. The vast majority of things can be made this way,and it really isn’t all that complicate.

    Sewing – The First Things You Need to Know

    Some of these are obvious, some maybe not so much. The first thing is that the most common stitch by far, is the straight stitch. This type of stitch is used on literally everything made through the craft of sewing.

    The second most common stitch, would be the zigzag stitch. For example, around the edge of the faithful old buttonhole, look closely, and you will see a compact form of zigzag stitch. They also appear in combination with the straight stitch, to create the Overlocker stitch

    When you want to learn how to sew, it may seem rather daunting. Fear not though, it’s really not all that complicated. Just take a look at any of the fabric items around you. I can pretty much guarantee that they will be made up of just two things – Seams and Hems.

    Seams:

    These are were two (or more) pieces of fabric join together.

    Hems:

    These are found at the edges and formed by folding and stitching the fabric in place, to form a neat edge.

    So there you are. Putting those few things together gets you well on your way in your quest to learn how to sew.

    Sewing Tutorials

    Here at We’re in stitches, to help you further along your way, we have put together some easy sewing projects. They will show you step by step how to sew a range of soft-furnishings including pillow cases, cushion covers and curtains. So be sure to check them out!


    How to make lined curtains – Step 7b of our Guide to Making Curtains

    So after completing steps 1 to 6 we find ourselves here at step 7b. That is of course, if you opted to make lined curtains.

    If your here and you haven’t completed the previous steps, click HERE to start at the beginning 🙂

    Ok… for the rest of us, let’s get on with making lined curtains.

    Sorting out the lining fabric to make lined curtains

    Obviously, since we are about to make lined curtains, we need to prepare the lining fabric. This is almost like making unlined curtains but without the side hems and header tape. Now, with that in mind, and to save me having to rewrite the processes covered previously, simply follow steps 4, 5 and 6. This time though, you’ll be working with your lining fabric.

    WAIT!!!… Just before you rush off to get started on that, there is one important difference.

    For our example, I decided to make lined curtains that are 182cm(72″) wide and have prepared the face / curtain fabric accordingly. Remember in step 4 we added the extra 4″ for side hems and 2″ for joining?

    Well this time, with the lining fabric, you only need to add a total of 3″. So we need the 72″, +2″ for joining the lining together and +1″ to join lining to the face fabric. That’s a total width of 75″. So the extra lining needed to make up the correct width in this case is 75″ – 54″ = 21″. Oh… and when sewing the lining together, stitch 1″ in from the edge.

    Ok… you can carry on now. Once your lining is joined and hemmed along the bottom, we can join it to the face fabric.

    Joining the lining and face fabric to make lined curtains

    With your lining fabric prepared, we will just do a quick check.

  • First measure the total width of your face / curtain fabric. For our example curtains the measurement is 76″
  • Then measure the total width of your lining fabric. Again, for our example curtains the measurement is 73″.
  • read more

    Hemming – Step 6 of our How to make Curtains guide

    To those who may have landed here looking for a guide to hemming ready made curtains. This page contains part of our guide to making curtains from scratch. Please take a look at our guide ‘How to shorten curtains the easy way‘ instead.

    Step 6: Hemming

    Hemming… a relatively straight forward stage of making curtains. There are a couple things to consider though.

    1. What size hem would you like?
    2. Which type of stitching will you choose?

    What size hem?

    The ‘Norm’ if you like, would be to have a 3 inch (7.5cm) hem. However if you are making curtains that are quite large or long, you may find that a 4 inch (10cm) hem gives proportionately better appearance. Or, if your curtains are going to be quite short, hemming them with a 2 inch (5cm) hem would be sufficient. However for the sake of this guide, we will be sticking with the norm, and hemming our curtains with a 3 inch (7.5cm) hem.

    Assuming you followed step 3 and made use of our Curtain fabric calculator, you should have a 6 inch (15cm) allowance for the bottom hem.

    So, taking one of the pieces of fabric we joined in step 5, lay it out face down with the bottom closest to you. Now, working your way from one side to the other, fold up 6 inches (15cm). Smooth out the fold as you go and place a pin at reasonable intervals as close to the crease as possible. This crease (crease 1), will be the bottom of your curtain.

    (If you wish, you can place the pin further up and iron the crease. Personally I find this much more time consuming and not really necessary.)

    Next, working from side to side again, tuck the cut edge under and down in to crease 1. Again, smooth out the new crease as you go, and move the pin from crease 1 to the new one (crease 2). When moving the pins, be sure the pin goes through all three layers of fabric.

    Right, that’s one ready for sewing. I imagine you can guess what I’m going to say next… Yeap!… Now do the same to the other piece of fabric. 🙂

    Which stitch?

    What do you mean – which stitch?

    Well, when I’m hemming curtains for our customers, some request that I do a ‘Blind hem‘. This type of stitch is used when you don’t what to see a row of stitches on the face of your fabric. Blind hemming can be done by hand or many sewing machines also have this function.

    Other customers don’t mind if you can see a row of stitches on the front of their curtains. Like me, they often comment.. “Who goes around inspecting the bottom of your curtains!”.

    Once you have decided which stitch to use for hemming your curtains, please feel free to sew along close to crease 2 on both of your ‘almost curtains’. You can remove the pins as you go.

    That’s the hemming done 🙂

    What’s next?

    What we do next depends on your answer to step 1.

  • If your making unlined curtains – next will be Step 7a: How to make unlined curtains.
  • If you are making lined curtains – next will be Step 7b: How to make lined curtains.
  • read more

    How to make Curtains Step 5: Joining Fabric

    Just before we start joining fabric, here is a quick check list…

    So far in our ‘How to make curtains guide‘, we have completed these steps:

    Step 1: Decide what type of curtains would you like to make.
    Step 2: Work out what size curtains you need.
    Step 3: Calculate how much curtain fabric is required.
    Step 4: Cutting your fabric to the correct length.

    Now, continuing on from ‘What about the Curtain width’ in Step 4, we are going to be joining fabric to make curtains wider than the 137cm(54″) fabric we are using for our guide.

    Step 5: Joining fabric.

    For those of you who are making curtains that are narrower than a single width of your chosen curtain fabric, please skip to Step 6. For the rest of us, it’s time to get those pins out.

    Joining fabric to make plain curtains: read more

    How to make Curtains – Easy step by step guide

    Can you tell me how to make curtains?

    How to make curtains like this - Pic of ready made curtains at Terry's fabricsYes! of course we can. In fact we would be happy to tell you how to make curtains. However, the answer to this question is not quite so simple.

    Unfortunately we can’t simply jump in and say “Fold this, pin that and stitch there… job done!”. That would be silly. This is mainly because, when you make curtains, there are different types and styles of curtains to choose from. Before we can tell you how to make curtains, we need to know
    that you have completed the first three steps to making any type of curtain.

    Step 1: Decide what type of curtains would you like to make.

    Here I think would be a good place to include a brief definition of the basic types of curtains. We won’t worry about the type of top finish for now, just the three basic types of curtains:

    Unlined Curtains:  A single layer of fabric hemmed at the sides and bottom with choice of top finish. Tab top, Ring top, Rufflet etc

    Lined Curtains: Similar to above but with an extra layer of fabric. A backing fabric usually of a plain cream or white cotton or satin.

    Interlined Curtains: Basically the same as lined curtains except they have an extra lining between the face fabric and the curtain lining. This extra lining is called Bump and is kind of a blanket type fabric.

    Step 2: Work out what size curtains you need. read more